
Angular CLI: Command Line Interface Guide
Discover the most commonly used options for generating new components and services, and explore the features that make Angular CLI a must-have for Angular projects.

Angular CLI, or Command Line Interface, is a powerful instrument that lets developers quickly scaffold, generate, and maintain Angular applications directly from a command shell.
It automates many of the tasks that are commonly performed in Angular projects.
Angular CLI allows easy to start a new Angular project, with a well-structured file and folder structure, generate new components and services, run the application in development and production mode, lint and test the code and deploy the application, which saves time, effort, and improves the efficiency of the development process.
In this article we'll learn:
- How to install Angular CLI
- Create a new Angular workspace using Angular CLI
- Generate new elements with Angular CLI
- ng generate component
- ng generate service
- ng generate module
- ng generate pipe
- ng generate directive
- ng generate library
- ng serve
- ng lint
- ng test
- ng build
- ng deploy
- ng update
First things first, let's get started by installing the angular cli tool.
How to install Angular CLI?
Actually is very simple, using the node package manager (npm) or yarn, installed globally. Before we jump into installing the cli tool, make sure you have nodejs and npm installed in your operating system, on how to install them, follow the latest guides of official nodejs documentation.
You can use visual studio code command line interface tool or other IDEs' command shell, I personally prefer working in WebStorm - it's a personal choice.
Or use your simple machine terminal, to be like a "guru" 😎.
Official angular documentation provides clearly steps on how to install cli, so let's open the command line interface, and run:
npm install -g @angular/cliIf everything runs well, this command prompt will install the latest version of the angular cli. To prove that, we run another command which outputs the angular cli version:
ng versionIf cli was installed successfully, you should see something like this:
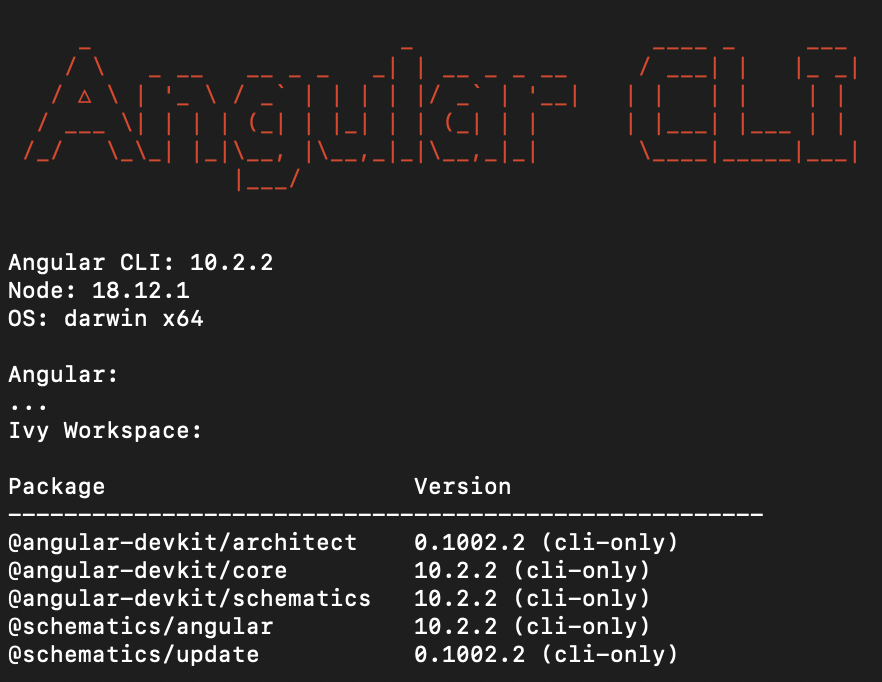
When I write this article, as you can see in this image, I have version 10 of angular cli installed among other cli packages.
You should see the same command output.
Some angular newbies could run cli ng in terminal, which is not right, there's no such command prompt, ng is the right command, simple and easy, don't mess up!
Create a new workspace using Angular CLI
To create a new Angular project, use the command "ng new my-angular-app" in the command shell:
ng new my-angular-appThis command will generate the basic files and folders required for the Angular application and will set up the project with the suggested files and folder structure.
The generated files and folder structure follows the best practices recommended by the Angular team, which makes it straightforward to understand and maintain.
Check more about what is an Angular Workspace and how to work with angular configuration values, now we'll go straight to cli tool commands.
Even though ng new does what we need, we can configure the application using interactive prompts. For example:
ng new my-angular-app --minimal--minimal tells Angular CLI to create a workspace without any testing frameworks, it is mentioned to be used just for learning purposes only.
Here's a list of the most commonly used options:
--style=css | scss | sass | less- The file extension or preprocessor to use for style files.--routing- Generate a routing module for the initial project.--inline-style- Include styles inline in the component TS file.--inline-template- Include the template inline in the component TS file.--minimal- Create a workspace without any testing frameworks.--skip-tests- Do not generate "spec.ts" test files for the new project.--help- Shows a help message for this command in the console.
For a full list of ng new command prompts, check the official angular documentation page.
It's important to mention if you can't remember a command prompt, you can always use --help which will help you pick what you need, or --interactive, which will enable interactive input prompts.
Now that we have the workspace prepared for work, let's proceed and generate our first element!
Generate new elements with Angular CLI
Angular cli makes it easy to generate new components, services, pipes, directives, libraries, and other elements of an Angular application.
This is done by using the ng generate command (or ng g shortly), followed by the type of element and name of the element you want to generate.
Even though you can generate many files using this command, we'll describe here only the most used schematics: components, services, modules, pipes, directives, and libraries.
ng generate component: Generate a new component
To generate a new component, run the following command in the terminal:
ng generate component my-component // or
ng g c my-component // shortly
This command will create a new folder called my-component with the necessary files for the component. Based on the prompt options we provide, it'll add the right configurations we need.

Let's list the most important command options here:
--change-detection=Default | OnPush- The change detection strategy to use in the new component.--display-block- Specifies if the style will contain:host { display: block; }--export- The declaring NgModule exports this component, in case this component is part of a library.--inline-style- Include styles inline in the component.ts file.--inline-template- Include the template inline in the component.ts file.--standalone- Whether the generated component is standalone.--style=css | scss | sass | less | none- The file extension or preprocessor to use for style files, or 'none' to skip generating the style file.--view-encapsulation=Emulated | None | ShadowDom- The view encapsulation strategy to use in the new component.
So this is how the command will look in case we want a standalone component with inline styles, inline template, change detection onPush, and with :host { display: block; } styles:
ng generate component my-component --standalone --inline-style --inline-template --display-block --change-detection=OnPushHere's an article on how to create a well-optimized component in Angular written by me a few years ago, and still applicable nowadays.
We also can make all these options default in the angular.json the file we mentioned earlier, just adding them inside schematics parameter as follows:
"schematics": {
    ...
    "@schematics/angular:component": {
        "standalone": true,
        "inlineStyle": true,
        "inlineTemplate": true,
        "displayBlock": true,
        "changeDetection": "OnPush"
    }
}
Now, if we run:
ng generate component my-componentwe'll have the same output as the command above.
The --standalone option creates a standalone component, but what's a standalone component?
A standalone component contains its logic, templates, and styles and can be imported and used in any part of the application.
It's useful for creating reusable UI elements that can be used across multiple parts of the application, such as a custom button or a modal dialog.
Standalone components came out first in Angular 14 and are still not so widely used within Angular applications, but it's the future of writing components in Angular as it has its benefits.
For more info, check it out here.
We know how to create a new Component, now let's see how we can generate a new Service using Angular CLI.
ng generate service: Generate a new service
Services in Angular are widely used, you won't find any application without a service in it. They provide a simple way to share data and logic and even create different instances based on anything you want, like an injection token or a simple configuration file.
I'll write an article soon about how I use services in Angular and how deeply you can go with it, subscribe, and don't miss out.
To generate a new service, use the following commands:
ng generate service my-serviceThis will create a new file called "my-service.service.ts", with a basic service class.

By providing --project you can change the project where this service must be created. By default, is the project from the folder you're running the command.
Let's list all command options here:
--flat- When true (the default), creates files at the top level of the project.--project- The name of the project.--skip-tests- Do not create 'spec.ts' test files for the new service.
ng generate module: Generate a new module
Since the Angular team released the new feature of Standalone Components, Modules in Angular was the basis of any applications, the core that brought all elements together. This was a negative point because everything must have to be imported and declared into the modules, and the big projects had to face big modules files.
Even though Angular Modules won't be used so widely in new applications, for the old projects it's still the main key to rely on.
To generate a new module, use the following commands:
ng generate module my-moduleThis will create a new folder called 'my-module' in the --project folder.

There're two types of modules Angular CLI allows to generate, simple and routing modules. To create a routing module, add the --routing option:
ng generate module my-module --routingAdditionally, provide --routing-scope=Child | Root to change the scope of the new routing module. By default is Child.
Here're some useful commands options:
--module- The declaring NgModule.--project- The name of the project where it should be created.--route- The route path for a lazy-loaded module. When supplied, creates a component in the new module, and adds the route to that component in theRoutesarray declared in the module provided in the--moduleoption.--routing- Create a routing module.--routing-scope=Child | Root- The scope for the new routing module.
ng generate pipe: Generate a new pipe
Pipes in Angular are the best way to transform some data straight within components' templates. While it is used to transform currencies, dates, and numbers visually, pipes can also be useful to cache or memoize the data it's been sent.
There're two types of pipes, pure and impure, used correctly, they are able to bring a huge increase in application performance.
As you might guess, creating a new pipe with angular cli is pretty straightforward:
ng generate pipe my-pipeThis will create a pure pipe and put it inside the "src" folder of the workspace directory.

Here're some useful command options:
--standalone- Whether the generated pipe is standalone.--skip-tests- Do not create "spec.ts" test files for the new pipe.--export- The declaring NgModule exports this pipe.
ng generate directive: Generate a new directive
Directives in Angular extend the component's logic mainly, but their task is way up to this. With the help of directives, components can be dynamically embedded based on some logic - like 'ngIf' and 'ngFor', add different class names - like 'ngClass' and so on.
There's no way to have an Angular application without using directives.
The same as pipes, generating a new directive is very simple:
ng generate directive my-directiveThis will create a new directive and import it to the root module.

Angular has a lot of built-in directives, such as "ngIf" and "ngFor" and many others. There're three types of built-in directives in Angular:
- Components - Used with a template. This type of directive is the most common directive type.
- Attribute Directives - Change the appearance or behavior of an element, component, or another directive.
- Structural Directives - Change the DOM layout by adding and removing DOM elements.
Open the official angular documentation for more info.
One of the coolest things I like, in Angular Directives, is starting with Angular 15, they added support for directive composition API, which makes working with "host" a "breeze", such as adding class to the host, adding custom styles to the host using 'NgStyle' and other cool stuff.
You should definitely check it out.
Some common options:
--standalone- Whether the generated directive is standalone.--project- The name of the project within should be generated.--selector- The HTML selector to use for this directive.--export- The declaring NgModule exports this directive.
ng generate library: Generate a new library
If you want to share some logic between multiple applications, or you have some UI components you want to share later with other developers, the Angular libraries are here for this scope.
To generate a new library with angular cli, run:
ng generate library my-libThe 'ng generate' command creates the 'projects/my-lib' folder in your workspace, which contains a component and a service inside a 'NgModule'.

See angular official documentation of angular libraries for more info.
Few common command options:
--entry-file- The path at which to create the library's public API file, relative to the workspace root. (default: public-api)--project-root- The root directory of the new library. (default: lib)--skip-install- Do not install dependency packages.--skip-package-json- Do not add dependencies to the "package.json" file.--skip-ts-config- Do not update "tsconfig.json" to add a path mapping for the new library. The path mapping is needed to use the library in an app but can be disabled here to simplify development.
ng serve: Run the application
Angular cli provides two solutions to run the application, in development and production mode. The development mode allows you to see the changes you make in real-time whereas the production mode stands to see how the application looks and behaves as production.
To run the application in development mode, run the following command:
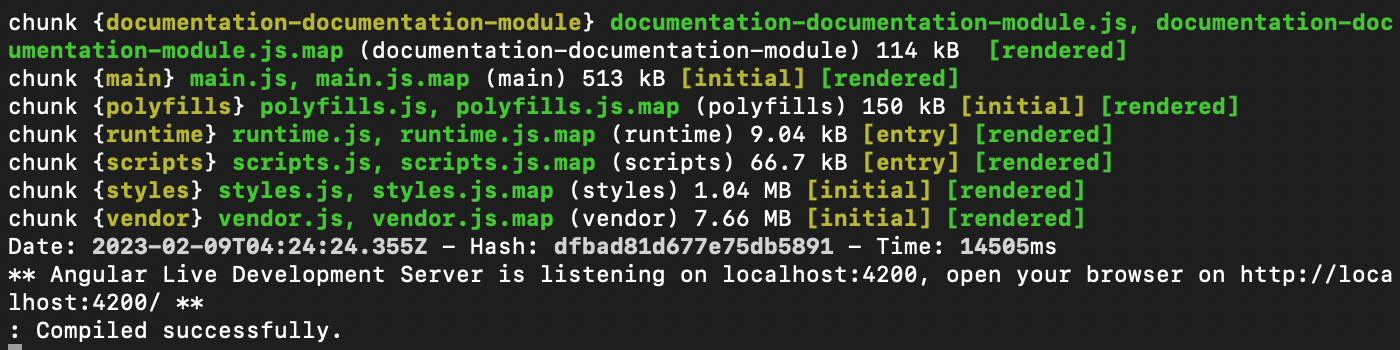
ng serveThis command compiles the application and starts the development server. It allows you to see the changes you make in real-time, without manual compilation.
The development mode also provides other features such as hot reloading - which automatically reloads the application once a file changes, and error reporting - which displays any errors in the browser console.
By providing the '--prod' flag to the previous command, angular cli will compile and start a production server:
ng serve --prodThis allows seeing the application in production circumstances, even though it runs on the local machine.

It's important to notice, the angular team doesn't recommend running production mode in a real production environment, build the application as production instead and configure your host to load index.html only. Check the next sections for more info.
ng lint: Lint code files
Before committing and pushing code to the repository, linting tools are a way to make sure the source code you push is formatted in the right way. This means the curly brackets, commas, spaces, and many other rules should be applied by all developers that work on the same project.
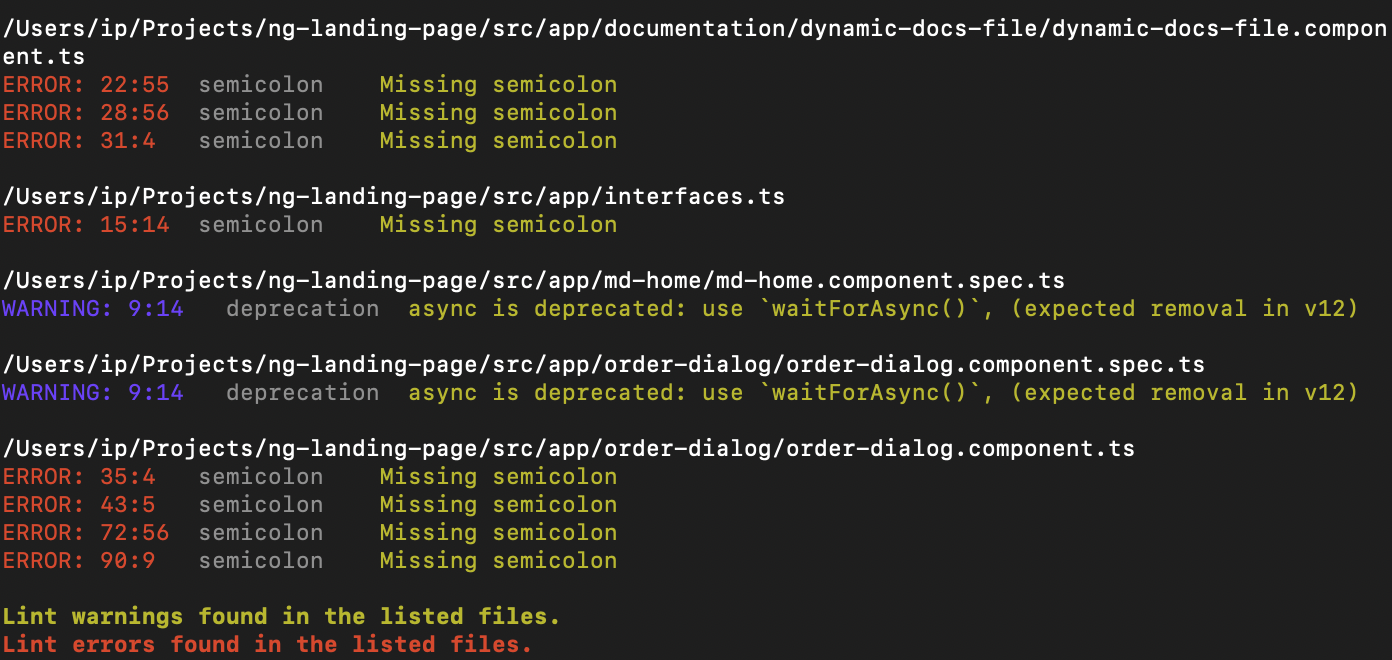
Angular CLI provides a lint command that checks your code for possible errors and inconsistencies. This is done by running the command 'ng lint' in the command prompt.
ng lintThis command analyzes the code and warns you about any issues, such as missing semicolons, undeclared variables, and other common mistakes for the entire source code. It can help you catch errors early on, making it easier to fix them.
If you want to check only one file for errors, ex: my-module, 'ng lint my-module' runs linting tools only for this file:
ng lint my-moduleYou should consider always running linting even on the file saved. It helps you to keep a clean and better code in time.
ng test: Run unit tests
Unit tests are a good solution to avoid bugs in production, and likewise to make sure new changes don't break the old code. Angular cli comes with a test runner, Karma, that is used to run unit tests.
The following command runs unit tests for all application's source codes:
ng testAnd this one runs tests just for a specific file, ex: my-module:
ng test my-moduleYou should always write unit tests for your code, this is a good practice in Angular.
ng build: Build the application
Angular cli comes with two simple commands to build and deploy your application to production. Let's see them in action:
ng build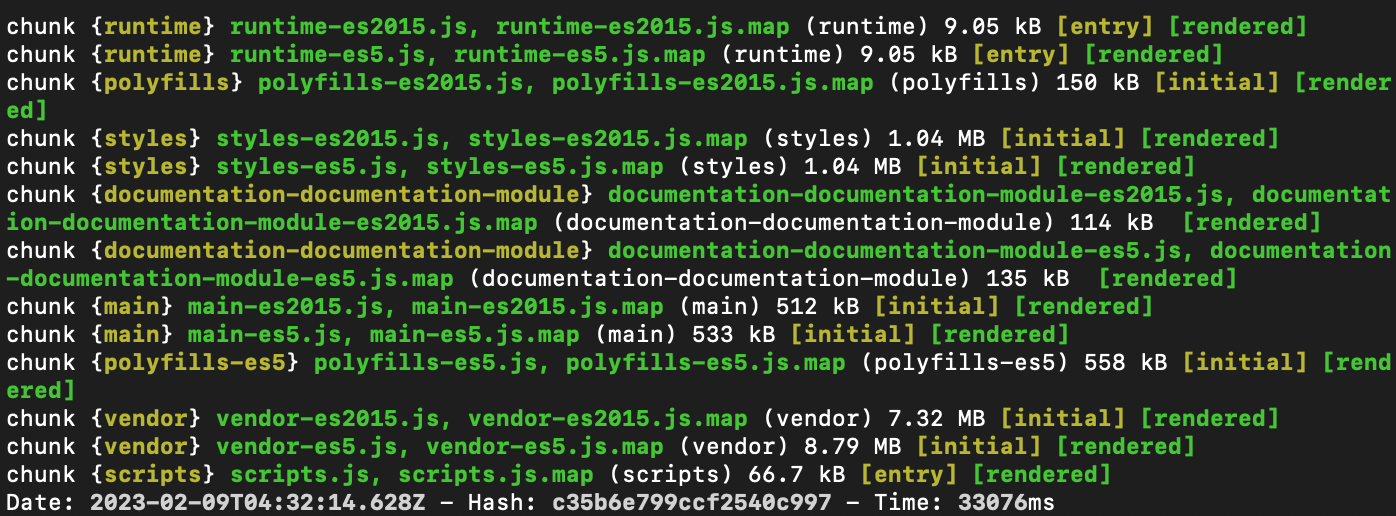
The 'ng build' command creates a production-ready version of your application that is optimized for performance and can be deployed to a live server or hosting platform.
ng deploy: Deploy the application
The 'ng deploy' command, on the other hand, allows you to deploy your application to a specified environment, such as Firebase, GitHub Pages, or any other hosting platform.
ng deployThe 'ng deploy' command allows you to deploy a project from the 'angular.json' file in the 'projects' section. If you don't specify a project name, it will use the default project.
To deploy a project, you need to use the 'ng add' command to add a package for deployment to your platform. This will add a CLI builder for the deployment process to your workspace configuration. For example:
"projects": {
  "my-project": {
    ...
    "architect": {
      ...
      "deploy": {
        "builder": "@angular/fire:deploy",
        "options": {}
      }
    }
  }
}
ng update: Update the Angular cli
To upgrade to the latest stable version of the Angular framework and CLI, run the following command:
ng update @angular/cli @angular/coreTo update to the next beta or pre-release version, use the --next option.
The angular team suggests that you upgrade to the newest patch version, which includes all the fixes we have issued since the initial major release. To do this, you can use the command below, for example, to update to the latest 10.x.x version:
ng update @angular/cli@^10 @angular/core@^10For detailed information and guidance on updating your application, see the interactive Angular Update Guide.
Conclusion
Angular cli is a powerful tool that makes it easy to scaffold, generate, and manage Angular projects.
Its ability to quickly create new projects with a well-structured file and folder structure, generate new components and services, run the application in development mode, lint code and deploy the application for production makes it a valuable tool for Angular developers.